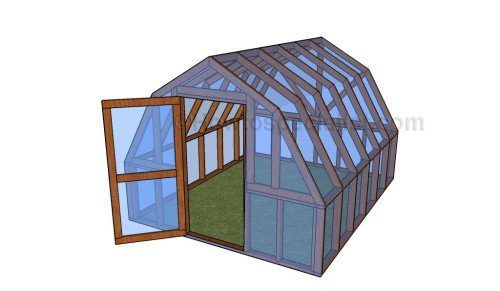

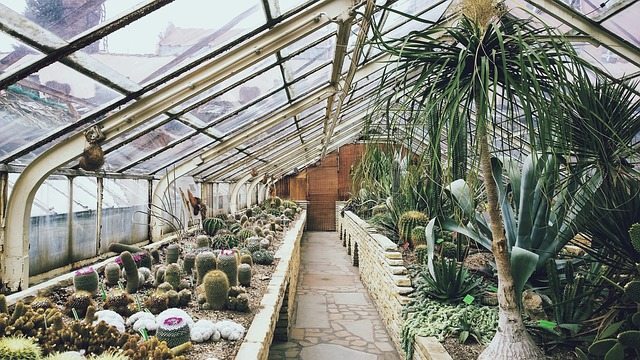
If you live where winter temperatures are well below freezing, a greenhouse allows you to grow plants year-round. You can plant cool-weather fall and winter crops inside the greenhouse, such as lettuce or broccoli. All greenhouses have similar uses, whether they’re shaped like domes, A-frames or Quonset huts, constructed with plastic sheeting or glass and framed with plastic pipes, wood or metal but with this unique barn looking greenhouse you reap a harvest in style!
More from the Homestead Guru: Tomatoes Hate Cucumbers: Secrets of Companion Planting + Popular Planting Combinations
Below you will find a plan to build your own barn style greenhouse and written step by step instructions:
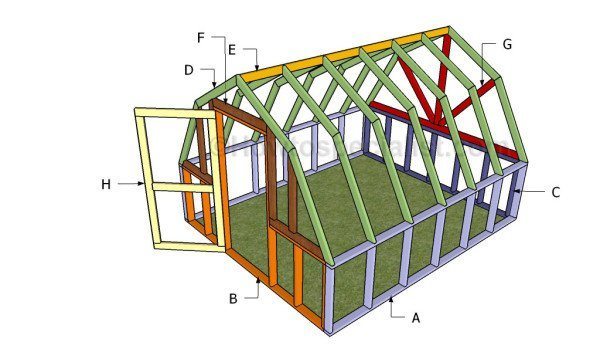
Materials
- A – 2 pieces of 2×4 lumber – 144″ long, 7 pieces – 33″ long 2xSIDE WAL
- B – 1 pieces of 2×4 lumber – 113″ long, 4 pieces – 33″ long, 2 pieces – 36 1/2″ long, 2 pieces – 76 1/4″ long, 1 piece – 40″ long FRONT WALL
- C – 2 pieces of 2×4 lumber – 113″ long, 7 pieces – 33″ long BACK WALL
- D – 14 pieces of 2×4 lumber – 48″ long, 4 pieces – 41 1/2″ long, 10 pieces – 40 3/4″ long RAFTERS
- E – 1 pieces of 2×4 lumber – 141″ long TOP RIDGE
- F – 1 piece of 2×4 lumber – 36″ long, 2 pieces – 35 1/2″ long, 2 pieces – 43 1/4 1/2″ long, 1 piece – 40″ long FRONT
- G – 2 pieces of 2×4 lumber – 117″ long, 2 pieces – 120″ long, 4 pieces – 39 3/4″ long BACK
- H – 2 pieces of 2×4 lumber – 37″ long, 2 pieces – 69 1/4″ long, 1 piece – 30″ long DOOR
Tools
- Safety gloves, glasses
- Miter saw, jigsaw
- Chalk line, tape measure, spirit level, carpentry pencil
- Drill machinery and drill bits
- Some of the best professional jigsaws
Tips
- Use a good miter saw to make the angle cuts
- Drill pilot holes before inserting the screws
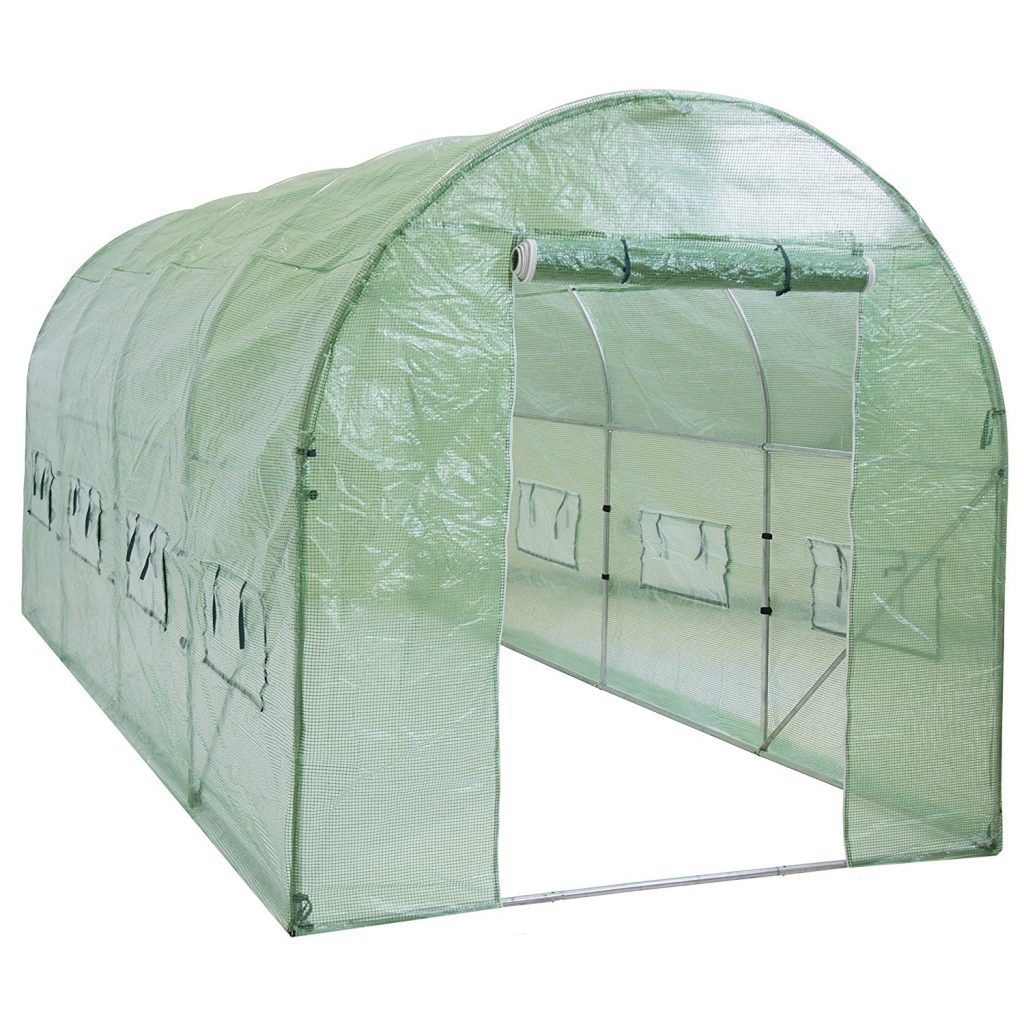 Get a Best Choice Products SKY1917 Walk-In Tunnel Green House Garden Plant, 15′ x 7′ x 7′ on Amazon!
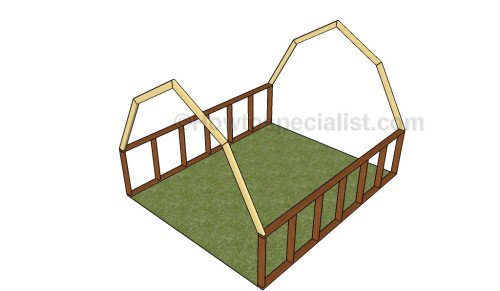
How to build a barn greenhouse
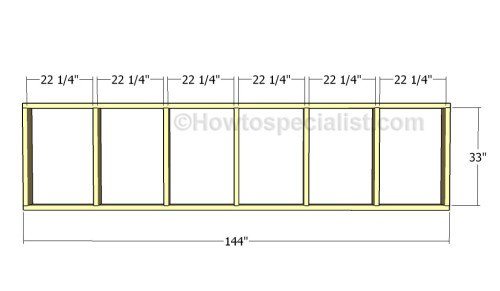
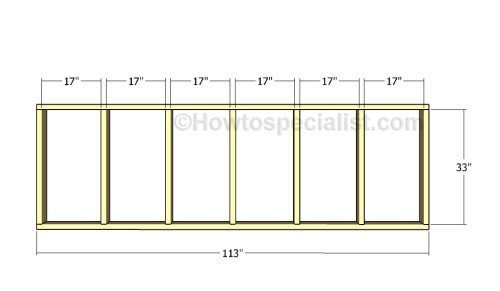
Building the side walls
The first step of the woodworking project is to build the side walls of the barn greenhouse. As you can easily notice in the diagram, we recommend you to build the components out of 2×4 lumber. Drill pilot holes through the plates and insert 2 1/2″ screws into the wall studs. Place the studs equally-spaced and make sure the corners are right-angled.
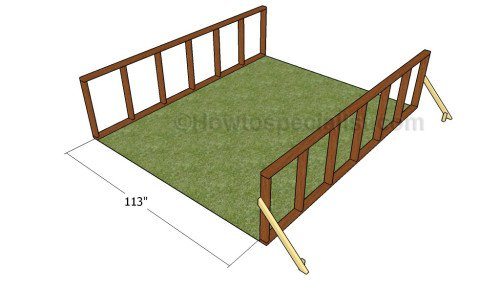
Fitting the side walls
After assembling the side walls you need to lay them to the construction site. Plumb the side walls with a spirit level and secure them into place using temporary braces. Make sure the surface is perfectly horizontal before fitting the side walls.
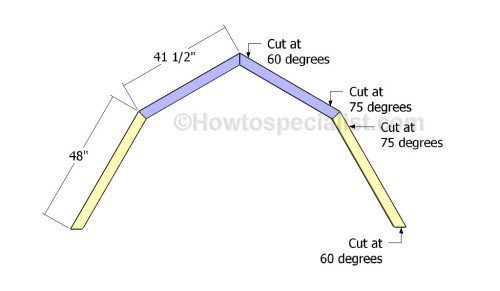
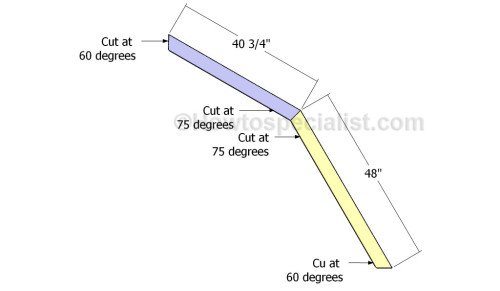
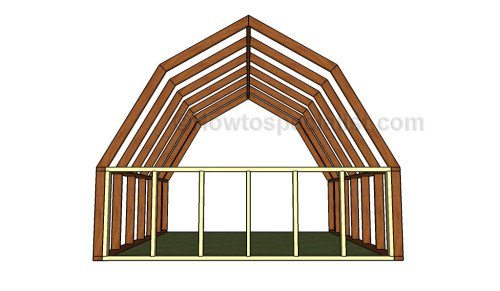
Building the end rafters
Next, you need to build the end rafters for the barn greenhouse. As you can easily notice in the diagram, you need to build the rafters out of 2×4 lumber. Make the angle cuts to the rafters, making sure you work with attention.
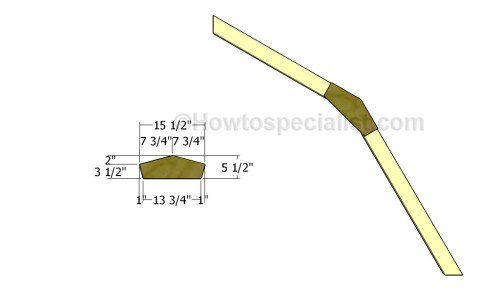
Building the gussets
It is essential to build 3/4″ plywood gussets, so you can enhance the rigidity of the rafters. Use the information in the diagram to build the gussets and secure them to the rafters using galvanized screws. Lay the rafters on a level surface and align the edges with attention. Lay the gussets to the rafters and secure them into place by inserting 1 1/4″ screws.
Fitting the end rafters
Fit the end trusses to the side walls of the barn greenhouse. Make sure the trusses are plumb and perfectly aligned, drill pilot holes and insert 2 1/2″ screws into the plates.
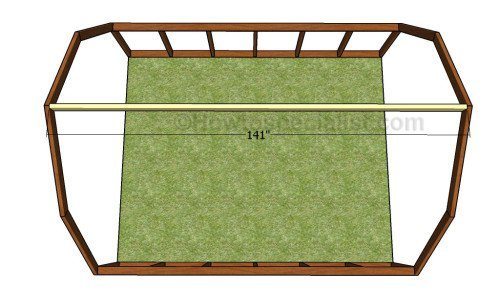
Fitting the top ridge
Continue the project by installing the top ridge to the structure. Build the top ridge out of 2×4 lumber and secure it to the top of the end trusses. Drill pilot holes and toenail the ridge to the rafters.
Building the rafters
Next, you need to build the intermediary rafters. Use the information shown in the diagram to make the right angle cuts to the rafters. In addition, we recommend you to fit gussets to both sides of the rafters. Use 1 1/4″ screws to secure the gussets to the rafters in a professional manner.
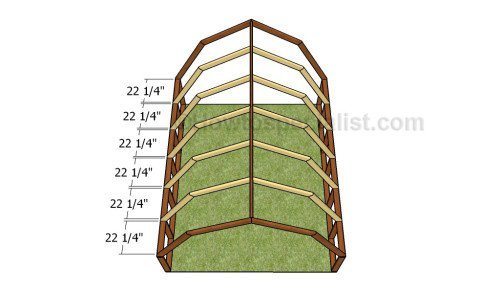
Fitting the intermediary rafters
Place the rafters to the structure, equally-spaced and secure them into place with screws. Drill pilot holes at both ends of the rafters and secure them to the top ridge and to the top plates. Leave no gaps between the components and make sure the screws are not protruding.
Building the back wall
After building the roof structure for the barn greenhouse, we recommend you to build the back wall. The first step is to assemble the base of the back wall. Cut the components out of 2×4 lumber. Drill pilot holes through the plates and insert 2 1/2″ screws into the studs. Place the studs equally-spaced, if you want to get a professional result.
Fitting the back wall
Fit the back wall to the structure and align the edges with attention. Drill pilot holes through the end studs and insert 2 1/2″ screws into the adjacent walls. Make sure the corners are right-angled for a professional result.
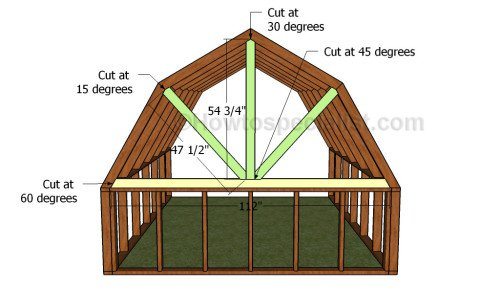
Building the top back wall
Next, you need to install the vertical supports that will provide extra-support to the roof of the barn greenhouse. Cut the components out of 2×4 lumber, making sure you pay attention to the angles. Drill pilot holes and secure the supports to the structure using 2 1/2″ screws.
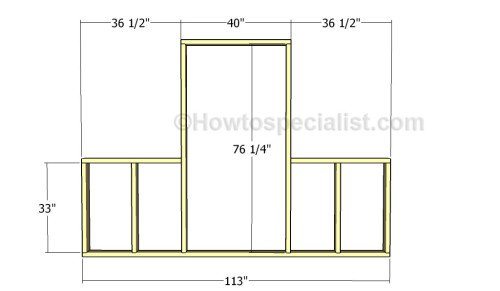
Building the front wall of the greenhouse
Continue the project by assembling the front wall of the greenhouse. Cut the components out of 2×4 lumber and lock them together, as described in the diagram. Drill pilot holes through the plates and insert 2 1/2″ screws into the studs. Make sure the corners are square for a professional result.
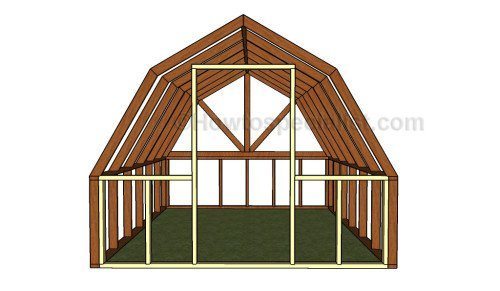
Fitting the front wall
Fit the front wall to the structure of the barn greenhouse. Drill pilot holes through the end studs of the wall and secure them to the side walls using 2 1/2″ screws.
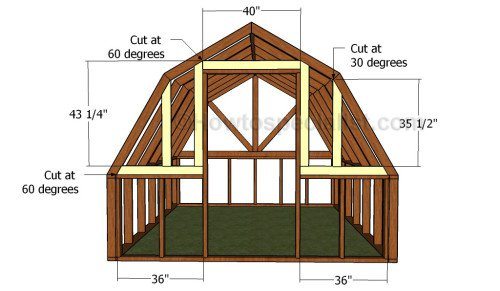
Building the front wall
Next, you have to install the rest of the components to the front face of the barn greenhouse. Cut the components at the right size, drill pilot holes and secure them to the structure using 2 1/2″ screws. Make sure you cut the components at the right size and angles.
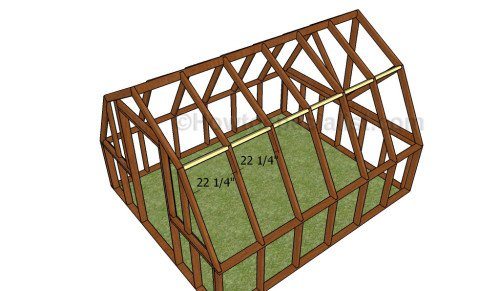
Fitting the roof blockings
Install 2×4 blockings between the rafters in order to enhance the rigidity of the greenhouse structure. Drill pocket holes at both ends of the blockings and secure them into place using 2 1/2″ screws. Leave no gaps between the components, if you want to get a professional result.
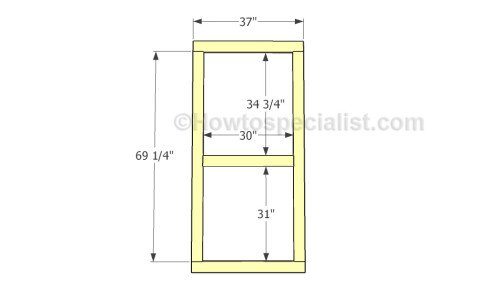
Building the door
Build the door for the greenhouse out of 2×4 lumber. Cut the components at the right size and smooth the edges with fine-grit sandpaper. Drill pocket holes at both ends of the vertical components and at both ends of the horizontal support. Align the components with attention and insert 2 1/2″ screws to get rigid joints. Make sure the corners are perfectly right-angled.
Fitting the door
Fit the door to the opening and secure it to the wall stud using three hinges. In addition, install a latch so you can close the door into place properly.
Barn greenhouse plans
Last but not least, we recommend you to take care of the finishing touches. In order to get a professional result, fill the holes and the gaps with wood filler and let it dry out for a few hours. Check if there are protruding screws and fix this issue, if necessary.